Manage projects
Project management in GLPI allows to follow entirely a project’s progress by creating tasks and building teams; projects can be optionally linked to a change.
A GLPI project allows:
defining tasks associated to the project and following their progress;
creating teams for a project and its tasks;
triggering sub-projects inside the project;
building GANTT diagrams;
using Kanban method;
attaching costs;
linking to GLPI ITIL items.
A project can be hierarchical, a project can therefore have sub-projects.
A project is characterized by name, code, state, type, provisional and real dates, percent done.
Distinct management teams can by composed of users, groups, suppliers and contacts.
Several GANTT diagrams are available for each project (see tab GANTT).
Project management relies on two types of items: project and project task.
Project
The different tabs
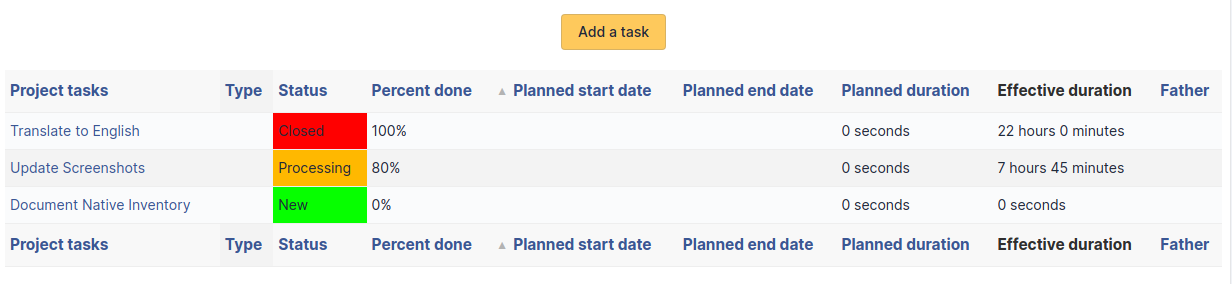
Project tasks
This tab allows to add new tasks to the project. It displays also already defined tasks with, for each task, its name, type, status, planned start and end dates, real start and end dates, percent done and parent task name.
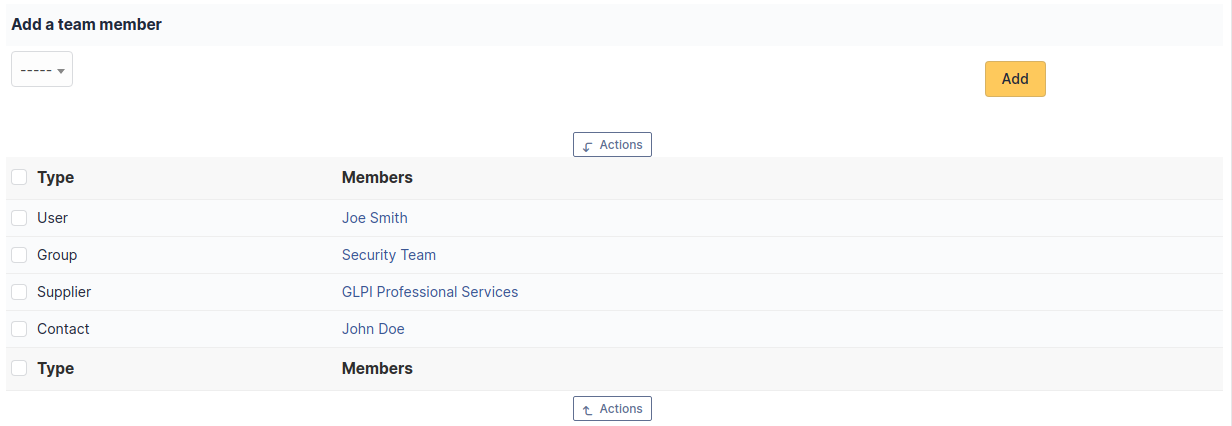
Project team
This tab allows to add new members to the project team, this member being a contact, a supplier or a group. It lists also members of project team with for each member its type.
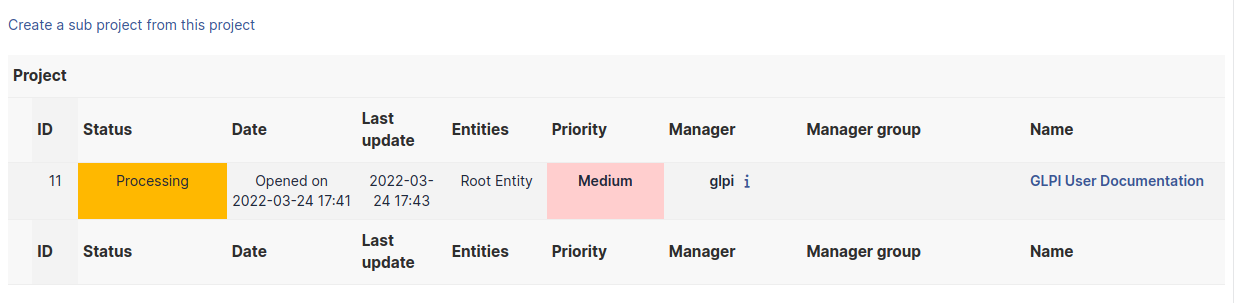
Project
This tab displays project’s sub-projects. A sub-project is defined the same way as a project, the only difference being that the field As child of is defined.
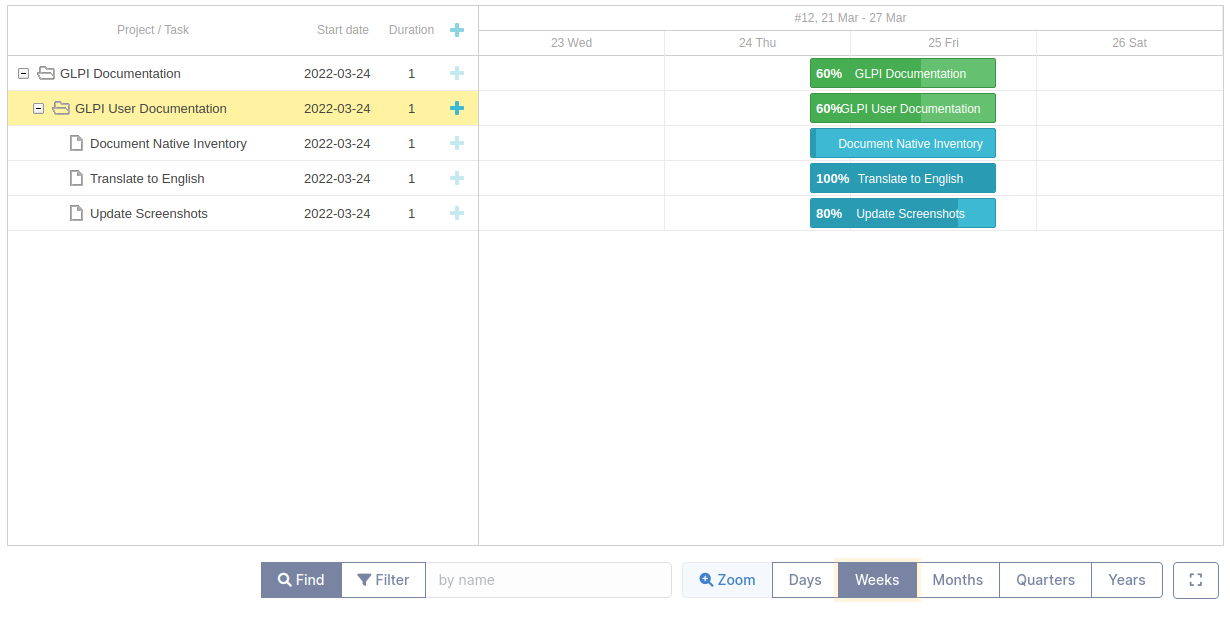
GANTT
A GANTT diagram is available for each project. A global GANTT diagram is also available, including projects defined as visible in this global diagram (field Show on global GANTT of the project form).
Kanban
This tab provides an interface to use Kanban method.

For more information about the Kanban feature, please refer to the full documentation.
Costs
Costs can be attached to projects; the costs of the tickets attached to project’s tasks will sum up to these costs.
ITIL objects
This tab allows to attach to the project GLPI ITIL objects: tickets, problems and changes. It is also possible to create these objects directly from this tab.
Documents
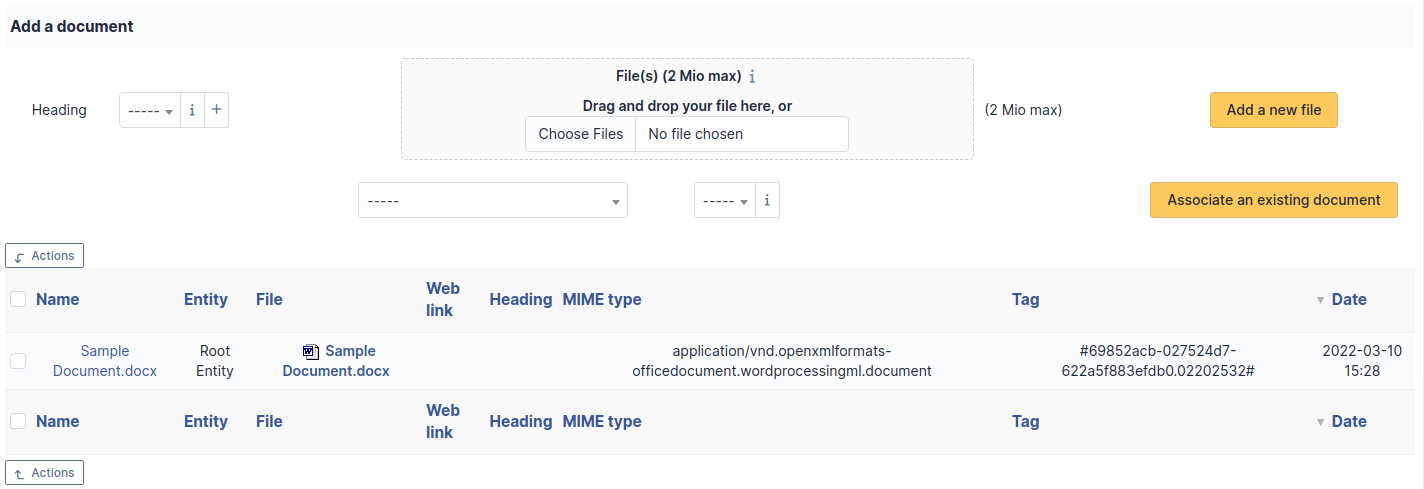
Additional information is stored in the form of external documents which are files uploaded into GLPI. In the Documents tab, documents can be associated and unlinked with the selected item. The management of the documents themselves is dealt with in another chapter.
It is also possible to quickly create a document via this tab by specifying the desired file and optionally the field in which the new document is to be placed. The name of the created document will be based on the name of the added file.
Note
When you delete a document from this tab via mass actions, you only remove the link between the object and the document; the document itself is still present.
Associated Contracts
The Contracts tab is used to show or add linked contracts.
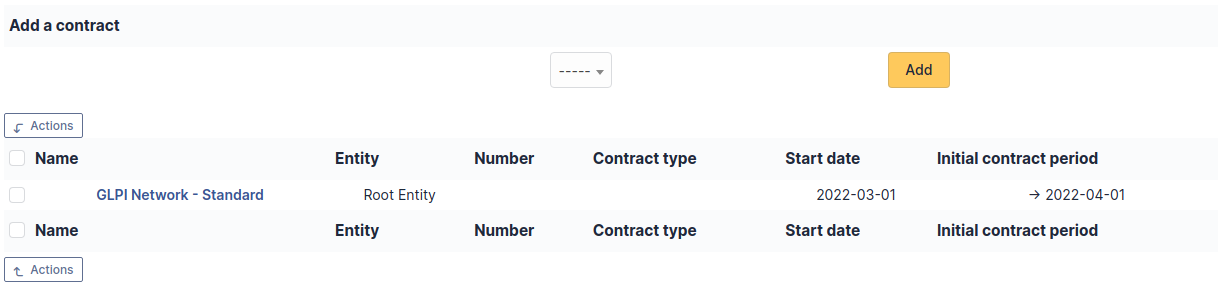
For each associated contract, the name, number, contract type, supplier, start date and initial duration of the contract are listed. In the last field, the end date of the contract is also shown with a red display if the date is earlier than the current date.
Refer to contract management for more information.
Notes
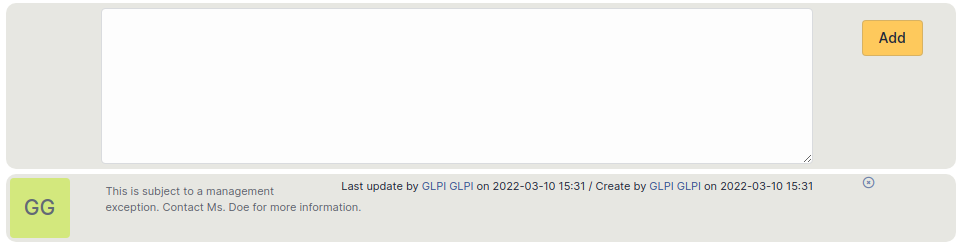
The Notes tab provides a free text field for storing additional information. Notes are displayed in the order of their creation. You can also add a document
Add a note
To add a note, click on +Add
You can add text and format it to suit your needs
You can add a document to this note

Delete a note
To delete a note, you need to click on delete
You can delete only the attachment by clicking on delete (the option appears when you move your mouse over the attachment)

Astuce
When you delete an attachment, it is not completely deleted, you can find it in Management > Documents
History
The History tab is used to show any changes made to an item. The following information about the changes is available:
ID of the change.
Date and time the change was made.
User who made the change. If this field is not filled, it means that the action was done automatically (For example: automatic inventory update).
Field that was changed.
Description of the change that was made.
The description of the change represents either the difference between the old and the new value (For example with location field: Change HQ to Remote Office A), or the explanation of the action which was carried out (For example: Uninstallation of a software: « Gimp 2.0 »).
Note
For dropdowns or objects with a parent/child relationship, the modification of a child will appear in the history of the parent element.
Debugging information
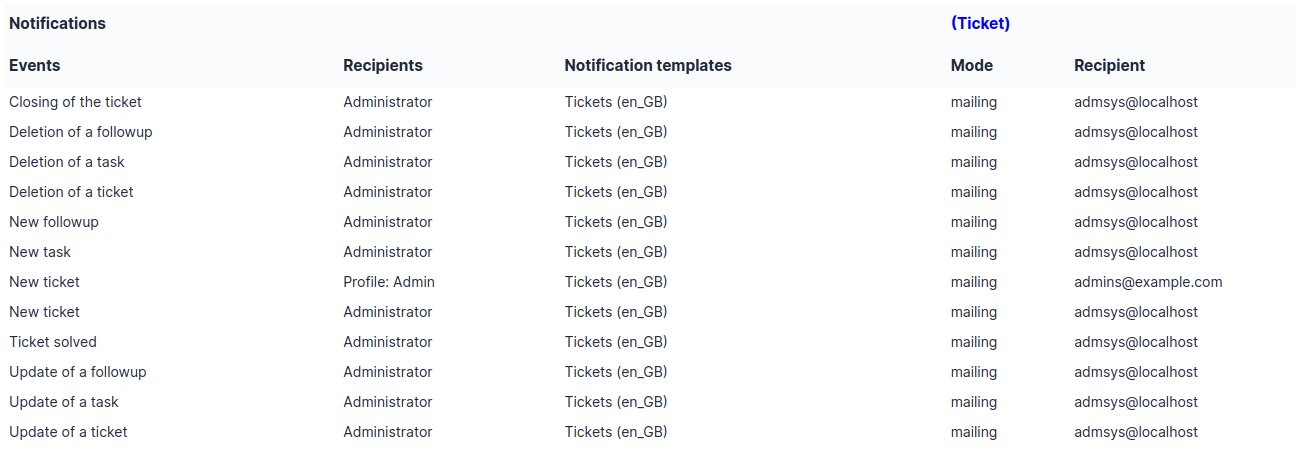
If you have Debug mode enabled in your preferences, a Debug tab will appear before the All tab. This tab offers information to help you resolve an issue.
For example, for a computer, you have one or more tables depending on the affected object (financial information, reservations…) listing the notifications that will be triggered on this computer with:
Triggering event
Recipient(s)
Notification model used
Recipient(s) email address
All Information
For an item, all information is displayed on one page from the All tab. This shows all of the tabs of an object’s form in one view, one below the other.
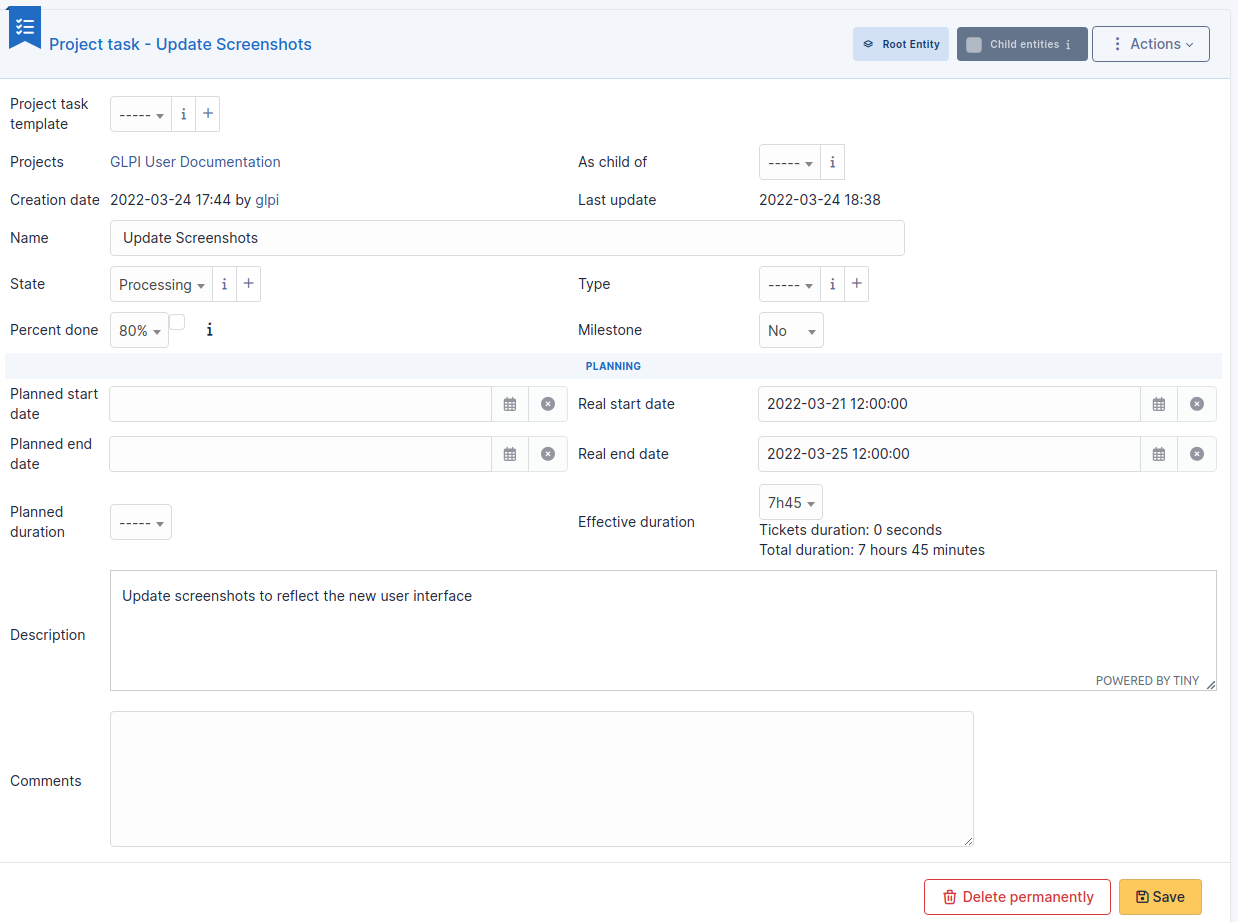
Project task
Task item is quite similar to a project.
A project task can also be a project sub-task.
A task is characterized by name, state, type, provisional and real dates, percent done.
Distinct management teams can by composed of users, groups, suppliers and contacts.
Note
A project task is not an independent item, it can only be accessed through the Project tasks tab of the project owning the task.
Tasks can be attached to tickets in order to plan interventions.
Planned and actual duration are also defined for a task, reported at project level together with attached tickets duration.
The different tabs
Project tasks
This tab allows to display and add sub-tasks.
Task team
This tab defines the team in charge of the task.
Documents
Additional information is stored in the form of external documents which are files uploaded into GLPI. In the Documents tab, documents can be associated and unlinked with the selected item. The management of the documents themselves is dealt with in another chapter.
It is also possible to quickly create a document via this tab by specifying the desired file and optionally the field in which the new document is to be placed. The name of the created document will be based on the name of the added file.
Note
When you delete a document from this tab via mass actions, you only remove the link between the object and the document; the document itself is still present.
Tickets
The Tickets tab is used to create a ticket associated with the current object. It also lists the tickets already linked to the object.
You can create a new one and then link it by clicking on New tickets for this item.
You cannot link an existing ticket here. If you want to link an existing ticket, go to assistance > tickets. Select the relevant ticket and go to the item tab
Note
A second table lists the tickets attached to the linked elements
Note
Any deletion or addition of a ticket is recorded in the history.
Notes
The Notes tab provides a free text field for storing additional information. Notes are displayed in the order of their creation. You can also add a document
Add a note
To add a note, click on +Add
You can add text and format it to suit your needs
You can add a document to this note
Delete a note
To delete a note, you need to click on delete
You can delete only the attachment by clicking on delete (the option appears when you move your mouse over the attachment)
Astuce
When you delete an attachment, it is not completely deleted, you can find it in Management > Documents
History
The History tab is used to show any changes made to an item. The following information about the changes is available:
ID of the change.
Date and time the change was made.
User who made the change. If this field is not filled, it means that the action was done automatically (For example: automatic inventory update).
Field that was changed.
Description of the change that was made.
The description of the change represents either the difference between the old and the new value (For example with location field: Change HQ to Remote Office A), or the explanation of the action which was carried out (For example: Uninstallation of a software: « Gimp 2.0 »).
Note
For dropdowns or objects with a parent/child relationship, the modification of a child will appear in the history of the parent element.
All Information
For an item, all information is displayed on one page from the All tab. This shows all of the tabs of an object’s form in one view, one below the other.