Manage changes
A change is a modification of the information system’s infrastructure.
A change can be created either from a ticket form or a problem form, in tab Changes, or from menu Assistance > Changes.
The form to create a change is similar to the ticket creation form and shares with it many terms: requester, watcher, assigned to, status, urgency, impact, priority, category. For more information see Manage tickets. The validation process is also the same as tickets in order to allow preliminary validation of the change (tab Validations).
Once the change is created, it is possible to attach tickets but also impacted items (tab Items). An analysis phase (tab Analysis) consists in describing impacts and controls list in order to implement this change through a deployment plan, a backup plan and a checklist (tab Plans).
Same as tickets, task, costs and solution allow to follow and solve the change. For complex changes management, a change can be linked with one or several projects allowing a mode detailed management (Manage projects).
Changes use their own notifications (see configuration of email follow-ups).
Add a change
To add a new change, click on + Add at the top of the screen
Fill in the various tabs of your change to make it as complete as possible
Status
Several statuses are available, including some for test phases, validation, qualification, etc.


Delete a change
To delete a change, click on the change concerned
Click on put in trashbin at the bottom of the screen
Restore or delete permanently
To delete or restore a change, click on the trashbin (at top right of screen)
Select the change concerned
Click on Actions
Select Restore or Delete permanently
Click on Post

Danger
Delete permanently remove definitively the change, you won’t be able to get it back.
The different tabs
Analysis
This tab contains :
Impacts
Control list in order to implement the change.

Plans
This plan contains :
Deployment plan
Backup plan
Checklist

Statistics
The statistics are intended to provide information, showing how long it takes to take over, close a change, etc. Statistics similar to tickets
Approvals
Approval allows you to send requests to groups and/or users (or certain users within a group) in order to obtain their validation of the change in question. You can see Approvals for more information.
Cost
Costs can be linked to the budget in order to estimate whether an expense will fit within the allocated budget.
You can add costs to your change. It can be :
Time cost
Fixed cost
Material cost
Add a cost
To add a cost, click on Add a new cost
You must add the information you wish
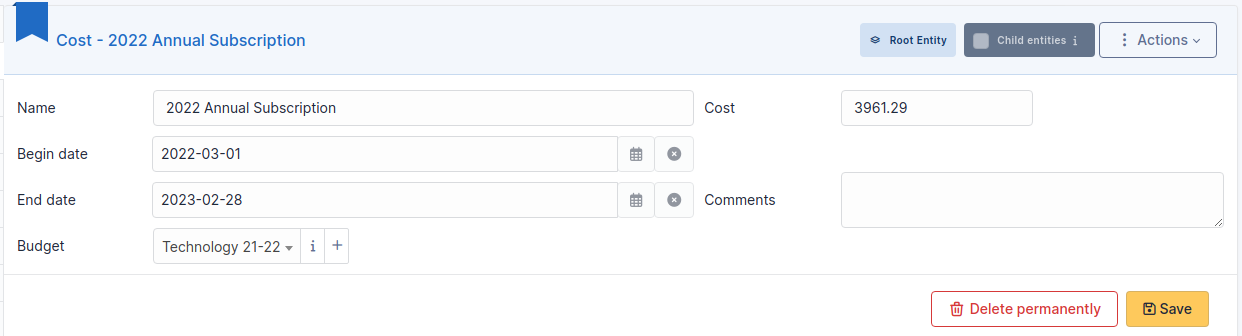
If you enter a budget, this expense will be deducted from the budget in question
Note
You can modify a cost later once it has been validated.
Delete a cost
To delete a cost, you need to click on it
The information appears in the top insert
Click on Delete permanently

If you enter a budget, this expense will be deleted from the budget
Avertissement
Once deleted, you will not be able to go back, you will have to enter the cost manually again
Projects
This tab allows to attach a project to the change and displays already attached projects.
The summary table contains for each project status, opening or closing dates, priority and supervisors.
Link a project
To link a project, select it une the dropdown list
Click on Add

Note
You can not add a new project by this step, you can just add an existing project. To add a new projects go to Tools > Projects
Unlink a project
To unlink a project, go to Tools > Projects > My_Project
In Item tab, select the item
Click on Actions
Select Delete permanently the relation with selected elements
clic on Post

Problems
Changes may be due to problems. In this tab, you can link a problem to your change.

Problems can be linked in several ways :
Linked To
Duplicates
Son of
Parent of

Problems can be linked in several ways. This information is for information purposes only.
Link a problem
To link a problem, select it une the dropdown list
Select the type of the link
Click on Add
Note
You can not add a new problem here, you can just add an existing problem. To add a new problem, go to Assistance > Problems
Unlink a problem
To unlink a problem, you need to use massive actions
Select the check box of the problem(s)
Click on Actions
Select Unlink ITIL Object
Select Change
Select the change concerned
Click on Delete permanently

Tickets
A change may have been introduced via a ticket. In this tab you can attach the ticket(s) affected by the change.

Like problems, tickets can be linked in several ways :
Linked To
Duplicates
Son of
Parent of
Tickets can be linked in several ways. This information is for information purposes only.
Link a ticket
To link a ticket, select it une the dropdown list
Select the type of the link
Click on Add
Note
You can not add a new ticket here, you can just add an existing ticket. To add a new ticket, go to Assistance > Tickets
Unlink a ticket
To unlink a ticket, you need to use massive actions
Select the check box of the ticket(s)
Click on Actions
Select Unlink ITIL Object
Select ticket
Select the ticket concerned
Click on Delete permanently
Items
Link a device
You can attach any item from the list below:
Computer
Database
Device
Enclosure
Monitor
Network device
Phone
Printer
Rack
Server room
Software
You can integrate your own devices or, if your profile allows, any other device.
if your want to link one of your device, select it in My devices. You can search a material directly by the search bar

If you want to link an other device, select the type of the item
Then, select the equipment concerned.

You can, of course, link several elements and several item types.
Unlink an item
To unlink an item, you need to use massive actions
Select the check box of the item(s)
Click on Actions
Select Delete permanently the relation with selected elements
Select Post

Impact Analysis
Impact analysis allows you to create diagrams of your infrastructure and see the impact of a change on it.
To see how impact analysis works, go to impact analysis
Knowledge base
The Knowledge base tab is used to show or add linked knowledge base articles.
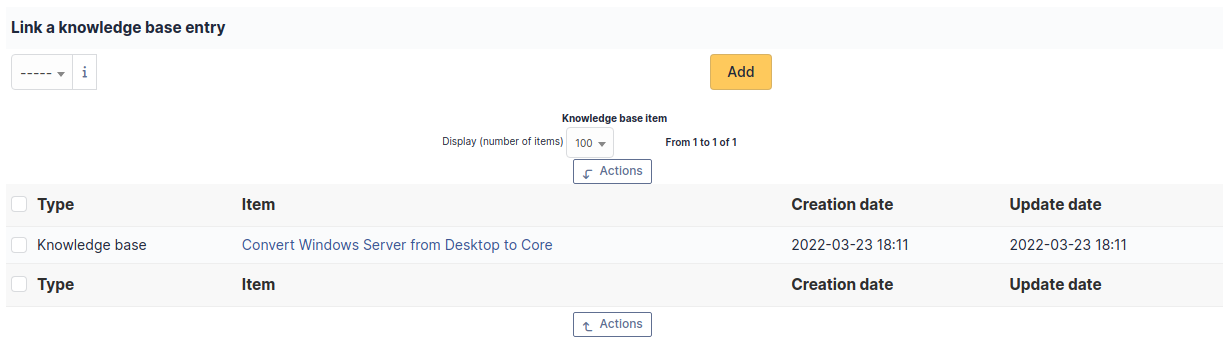
From this window, you can link an existing article to a GLPI object. However, it is not possible to create an article from this section.
Note
You cannot create an article from this tab. To create a new article, go to knowledge base
Link an article
To link an article, you just need to select it in the dropdown lit
Click on Add

Unlink an article
To unlik an article, you need to use the massive action. Click on the checkbox of the item(s) you wish to remove
Click on Actions
Select Delete permanently the relation with selected elements
Click on Post

Notes
The Notes tab provides a free text field for storing additional information. Notes are displayed in the order of their creation. You can also add a document
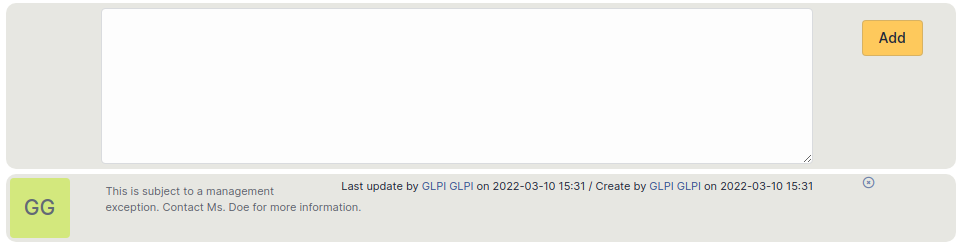
Add a note
To add a note, click on +Add
You can add text and format it to suit your needs
You can add a document to this note

Delete a note
To delete a note, you need to click on delete
You can delete only the attachment by clicking on delete (the option appears when you move your mouse over the attachment)

Astuce
When you delete an attachment, it is not completely deleted, you can find it in Management > Documents
History
The History tab is used to show any changes made to an item. The following information about the changes is available:
ID of the change.
Date and time the change was made.
User who made the change. If this field is not filled, it means that the action was done automatically (For example: automatic inventory update).
Field that was changed.
Description of the change that was made.
The description of the change represents either the difference between the old and the new value (For example with location field: Change HQ to Remote Office A), or the explanation of the action which was carried out (For example: Uninstallation of a software: « Gimp 2.0 »).
Note
For dropdowns or objects with a parent/child relationship, the modification of a child will appear in the history of the parent element.
All Information
For an item, all information is displayed on one page from the All tab. This shows all of the tabs of an object’s form in one view, one below the other.