Manage problems
A problem is the cause of potential incidents and, once identified, can be managed in GLPI.
Creating a problem object can be done either from the ticket form, in tab Problem, or directly from menu Assistance > Problems.
The problem creation form is very similar to the ticket creation form and shares with it many concepts: Requester, Watcher, Assigned to, Status, Urgency, Impact, Priority, Category. For more information, see Manage tickets.
À faire
Check what is means From tickets list, an alternative solution can be associated to linked tickets without solving the problem. Depuis la liste des tickets, une solution de contournement peut être associé massivement aux tickets liés sans pour autant résoudre le problème.
Problems use their own notifications, see configuration of email follow-ups.
Statistics similar to tickets are available for problems, see Display statistics.
The different tabs
Analysis
This tab contains problem analysis.
It consists of 3 inserts:
Impacts
Causes
Symptoms

Statistics
Statistics similar to tickets are available for problems.

Tickets
List all tickets are linked to the problem. You can add a new ticket or link an existing ticket


Changes
This tab allows to display changes associated with the problem and add new changes. See changes

Costs
The cost represents the financial impact of the problem encountered. It can be human, material or fixed.
Avertissement
A cost cannot be added once the problem has been closed or resolved.


Projects
You can attach or add one or more projects to your problem.

Tasks
A task is an action linked with a problem, usually a technical intervention. See Tasks
Items
This tab allows to attach an item to the problem by choosing the type and the selected item. See Items
Impact analisys
Impact analysis enables you to visualise the impact of failures on an entire infrastructure
Notes
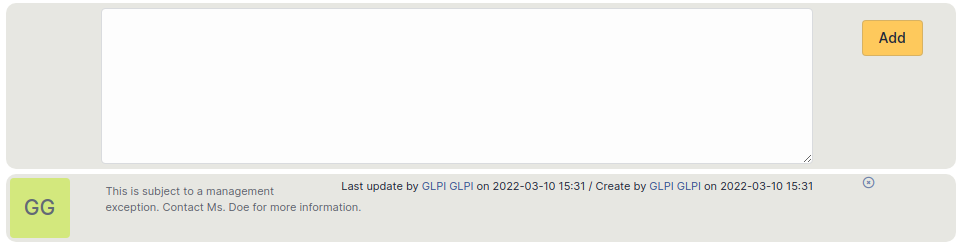
The Notes tab provides a free text field for storing additional information. Notes are displayed in the order of their creation. You can also add a document
Add a note
To add a note, click on +Add
You can add text and format it to suit your needs
You can add a document to this note

Delete a note
To delete a note, you need to click on delete
You can delete only the attachment by clicking on delete (the option appears when you move your mouse over the attachment)

Astuce
When you delete an attachment, it is not completely deleted, you can find it in Management > Documents
Knowledge Base
You can link an article from the knowledge base. It is possible to add a new article by clicking on i
History
The History tab is used to show any changes made to an item. The following information about the changes is available:
ID of the change.
Date and time the change was made.
User who made the change. If this field is not filled, it means that the action was done automatically (For example: automatic inventory update).
Field that was changed.
Description of the change that was made.
The description of the change represents either the difference between the old and the new value (For example with location field: Change HQ to Remote Office A), or the explanation of the action which was carried out (For example: Uninstallation of a software: « Gimp 2.0 »).
Note
For dropdowns or objects with a parent/child relationship, the modification of a child will appear in the history of the parent element.
All Information
For an item, all information is displayed on one page from the All tab. This shows all of the tabs of an object’s form in one view, one below the other.